|
If something is worth doing, it’s worth doing right. |
 |
|
|
|||
|
ProjectsMission Dining Table and ChairsIn the early spring of 1998, my wife decided that it was time to
buy a new dining table and chairs. By this time, I had
accumulated a few hand tools and had done a little bit of
woodworking. In the back of my mind, I told myself that I could
build them, provided she didn't want any fancy design. We went
shopping. She looked at several candidates and gravitated toward a
couple of Mission-style sets. They were in the $5,000 to $7,000
price range and, when I got down under the tables, were made of what
appeared to be very thin veneers on some type of termite barf. I
proclaimed that I could make a better product, and AT HALF THE
COST!, including the occasional tool I might need;-) After some
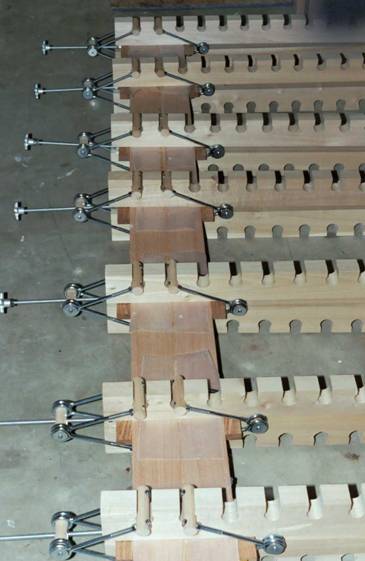
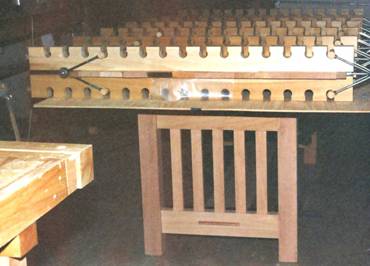
negotiating (she considered it hounding), she finally relented. My first task was to cut the beam down into rough legs. Since neither my old Craftsman table saw nor my benchtop bandsaw would handle lumber this size, I decided to cut them with a handsaw. I didn't have a rip saw, but figured my Grand Dad's old Disston D8 crosscut would do fine. I didn't have a suitable means of supporting the beam sections while sawing, so I took a month-long detour to build a sawing bench.
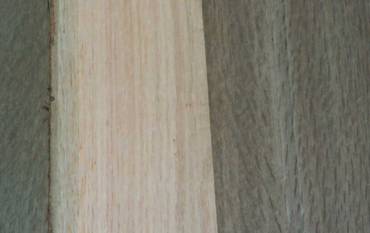
Well, the crosscut saw was slow, but I eventually had 5 leg blanks cut (one spare in case I screwed up).
I then started the task of planing them down to finished size and
squaring them up.
Next came the stretchers, slats, and lower shelf, and then I
assembled the base. Sorry, no pics of the base by itself ;-(
And here is the last board being glued to the top. I used one of the newer urethane glues (moisten one side of the joint) and that's waxed paper between the glue joint and the clamps to keep from gluing the clamps to the table. To make it easier on my back, I dropped a sheet of plywood on the base and used it as an assembly table. I also laminated a ~3" wide strip to the underside of the tabletop edges and ends, to make the top look thicker. At 79" X 39", a 3/4" tabletop looked out of place
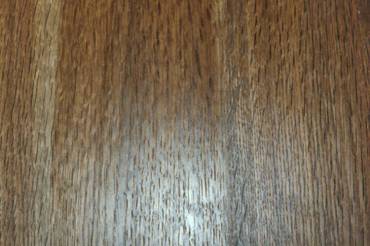
After trimming the top to final size and smoothing it, I figured
it was time to move on to the next step – finishing. I wanted to do
it in the traditional manner, so I searched around and finally found
a chemical supply house that would sell me industrial strength
ammonia (~27%, as opposed to the ~5% available at the corner
market). I also ordered a good organic vapor respirator from MSC.
Next I slapped on a coat of boiled linseed oil and it looked like this.
All that was left was to shellac the thing, and put a good finish
on the top. I put 4 or 5 coats of Paddylac super blonde on
everything and 3 coats of McKloskey's Heirloom Tabletop Varnish on
the top (both sides). I rubbed it out with synthetic steel wool and
Murphy's Oil Soap.
I was then ready to tackle the chairs. The plans in the book called for 2" X 2" X 24" front legs and required a 2" X 4" X 40" blank to cut the dogleg back legs from. I laminated up blanks from two boards, using just about every clamp I own. I was able to get two rear legs from each of these blanks. The plan was for 4 side chairs and 2 arm chairs, which is what I built. With about 30 mortise and tenon joints per chair, the mortiser got a real workout! Here's a shot of the assembled side chairs, with arm chair components also in view.
Here's a shot of a finished side chair. The chairs are all fumed, with BLO and 5 coats of Paddylac applied, then rubbed out with 3M's white synthetic steel wool and a coat of paste wax.
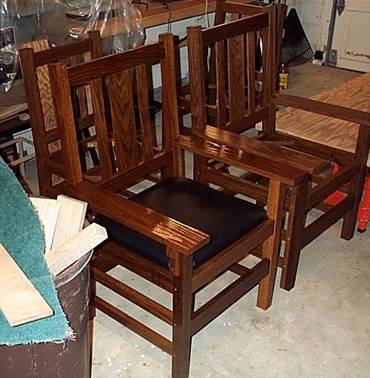
And here's a shot of the arm chairs nearing completion.
The seats are ½" luan ply, covered with 2" of upholstery foam and 1" of synthetic padding, topped with black "Naugahyde". I had thought about using leather, but decided on vinyl because of the ease in cleaning it. With the experience gained in building the table, the chairs only took about 12 months to complete, including a 3 month break due to a herniated disk. Ouch!! |
||


|
|